How to Make my
|
|
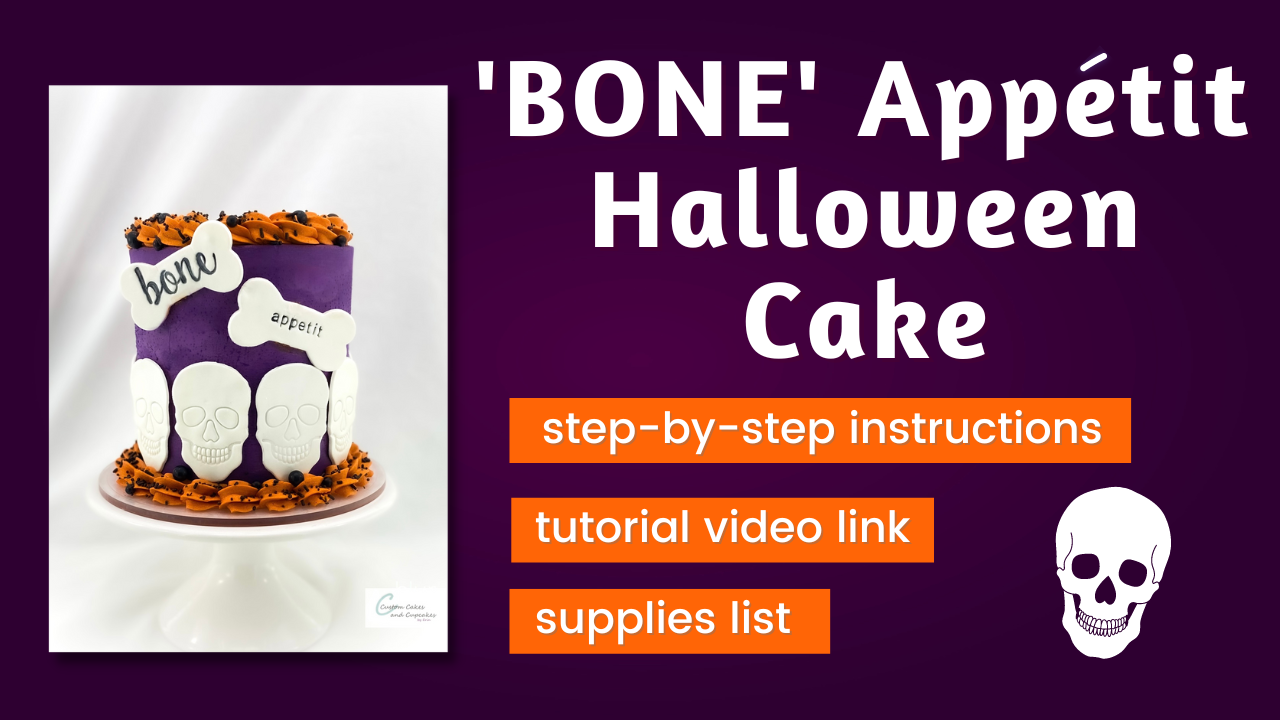
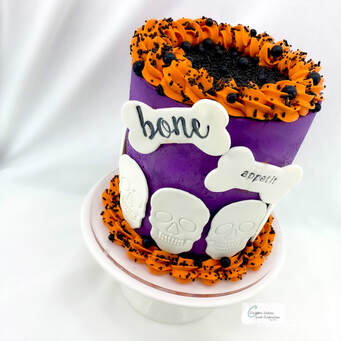
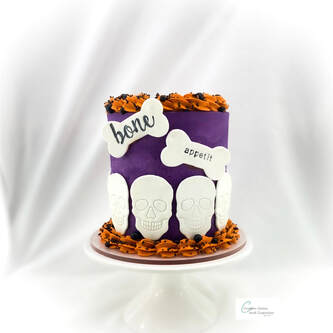
A vibrant Halloween cake is perfect for any spooky season celebration! Learn to frost a layer cake and pipe two essential buttercream borders. I have also included instructions and helpful links on how to create these fun and festive (but totally optional) fondant pieces.
'BONE' appétit and happy Halloween!
'BONE' appétit and happy Halloween!
What You Need
Find links for supplies and materials at the bottom of this page
Recipes (find all my recipes HERE), or your favorite cake and buttercream frosting recipe/mixes
Cake pans - 5" or 6" sizes
Gel coloring - purple and orange
Cake decorating turntable
Offset spatula
Cake smoother/scraper
Piping bag
Piping tip - 1M or 2D
Black sprinkles (or Halloween colors)
My easy fondant recipe HERE, or your preferred fondant or sugar paste
Cornstarch
Rolling pin
Skulls and bones or other Halloween shaped cutters/embossers
Alphabet embossing stamp sets
Edible black paint
Fine brush
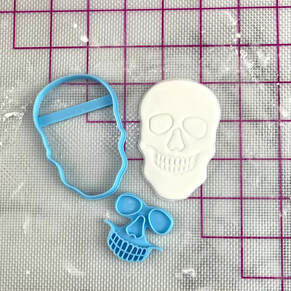
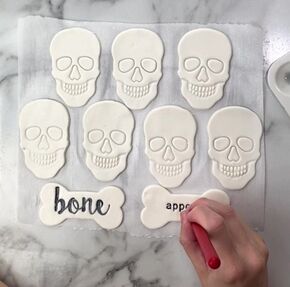
Step 1: Making the Fondant Decorations
|
Find my full DIY homemade Marshmallow Fondant recipe and tutorial HERE, or you can use store bought or your own favorite recipe.
You can either leave your fondant its white color, or knead in some white gel coloring if you want to whiten it further. Dust your surface in cornstarch to prevent sticking, and roll out some fondant. I used a skull embosser and cutter set to create several fondant skulls. I also spelled out 'bone' and 'appetit' using alphabet embossing stamp sets, and then cut these out with bone shaped cutters. I'll link all of these options below. Allow these to dry uncovered at room temperature out of sunlight for a few hours or overnight. They will harden and maintain their shape. Paint in the embossed text using the black edible paint. Let dry. |
|
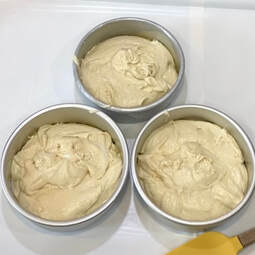
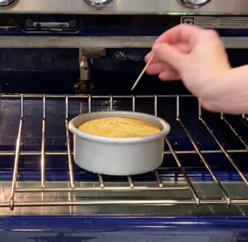
Step 2: Baking the Cake Layers
|
Mix up your favorite cake recipe (find all my recipes HERE), or use a boxed mix and prepare as per directions.
Decide which flavor(s) and size to bake. This design can easily be adapted for any cake size. A very tall or very short cake will have a different look. I chose to make a 3-layer 5" cake for this, but sizing is of course entirely your choice. My recipes can be found HERE, or you can use a preferred recipe, a boxed cake mix, or purchase a cake from a grocery store to decorate and skip this step. I like to add parchment circles to bottoms of cake pans for easy release. You may also cut circles from rolled parchment paper instead. Spray the bottoms and sides of cake pans with nonstick cooking spray/canola spray. Divide the cake batter evenly among the three cake pans, filling them approximately 1/2 to 2/3 full. Bake as directed by your recipe or mix package. Layers will be done once a toothpick comes out clean from the center. Run a knife around the edge of the pan to allow the layer to release more easily. Allow layers to cool completely before decorating if you are decorating shortly after baking. Otherwise, while still warm, wrap the layers in plastic wrap and store in the freezer in airtight container until ready to decorate. |
|
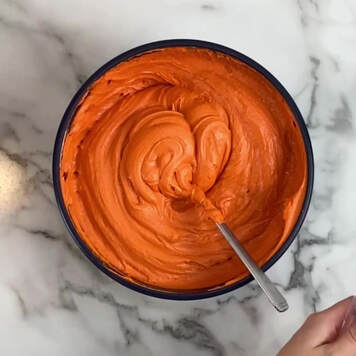
Step 3: Making Buttercream Frosting
|
Mix your favorite buttercream frosting (find all my recipes HERE) in a stand or hand mixer on low to medium speed, or use prepackaged frosting.
Divide buttercream into two bowls. Color as follows: Purple (at least 3-4 cups of the buttercream): 6-7 drops purple gel coloring. Add 2-3 tsp of your recipe's liquid ingredient to thin the consistency a bit for easier frosting/spreading. Orange: 5-6 drops orange gel coloring. Note: one option would be to divide the buttercream into three bowls instead, leaving one white in color for in between the layers and the crumb coat if you'd prefer to use less coloring. You may use any color to fill in between the layers and crumb coat the cake, as this will be covered by the outer layer. The colors will deepen with time, so buttercream may be made a day or two in advance and stored in the refrigerator in an airtight container. If refrigerating, allow buttercream to warm up a bit at room temperature before using to make piping easier. Keep covered until ready to use. Stir well just prior to using to press out air bubbles. |
|
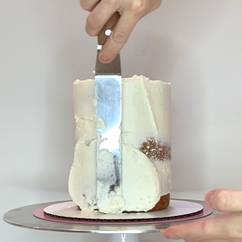
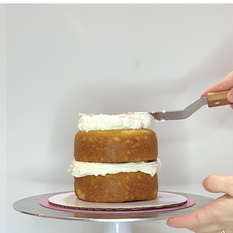
Step 4: Stacking and Crumb Coating
|
Using an offset spatula, spread a little of the the buttercream frosting color you have chosen for inside the cake (or white as per option above) onto the cake board, and place the first layer down. Spread more of the buttercream onto the first layer, and then add the second cake layer. Repeat this on the second layer and place the third layer upside down on top (placing the top layer upside down gives a sharper edge to the top of the cake).
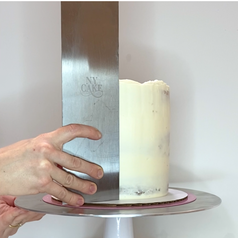
Spread the buttercream over top of the cake with offset spatula, continuing with the sides of cake as shown in video. Once the cake is covered, use the cake scraper to smooth the sides (see video), leaving a thin coat of buttercream. This may take several passes. Use your offset spatula or an angled spatula to pull the extra buttercream on top in toward the center to create a sharp edge. Chill the cake in the refrigerator for 20-30 minutes or until the buttercream is set and firm to the touch. |

|
|
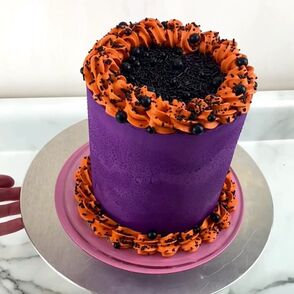
Step 5: Frosting the Final Coat
|
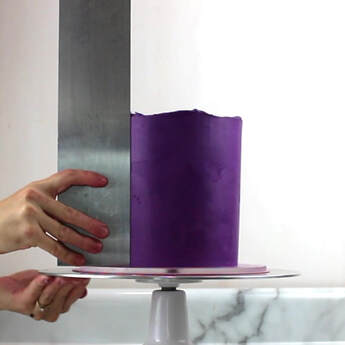
Spread a generous amount of the purple buttercream over the top of the cake and continue spreading over the sides, keeping the spatula straight against the sides.
Smooth the buttercream with your scraper. It is helpful to warm up the metal under hot water (wipe dry) to soften and smooth the buttercream. This may take several passes. Create the top edge by pulling off extra buttercream in toward the center with your offset or angled spatula just like when crumb coating. Chill the cake in the refrigerator for 20-30 minutes or until the buttercream is set and firm to the touch. |
|
Step 6: Preparing to Decorate
|
I used piping tip 1M for this border, but a 2D tip will give a similar look. Place your tip into a piping bag and cut off the tip of bag, so the piping tip sticks through, but stays in place.
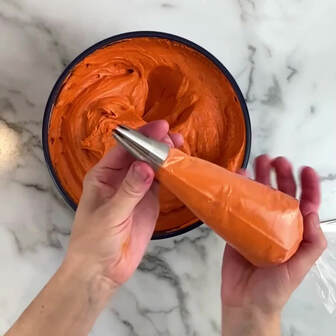
Using a spoon or spatula, add the orange buttercream to the piping bag. |
|
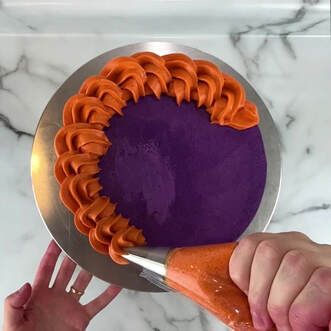
Step 7: Piping the Buttercream Shell and Spiral Borders
|
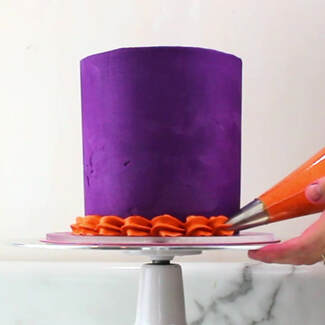
Buttercream shell border:
At the bottom of the cake, squeeze your piping bag with medium pressure and hold this position for 3 seconds, allowing the “shell” to fill. Release this pressure fully, then pull away. This is one buttercream shell. Repeat this all around the bottom of the cake. See video for piping demonstration. Buttercream spiral border:
With medium pressure, start by piping a short line of buttercream onto the top of the cake near the edge to anchor it. Without picking up the tip, pipe a continuous spiral by moving your hand counterclockwise and maintaining steady pressure. Move slowly and pipe each new rotation so that it is touching the last rotation (see video). If you need to reposition your hand grip, push down the buttercream, or refill your piping bag, pull off the cake by pulling the piping in toward the center and continue on top of the "tail". |
|
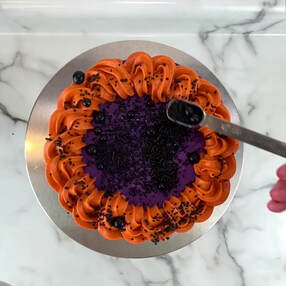
Step 8: Adding Sprinkles
|
Using a small spoon, tweezers, or clean fingers, add sprinkles to both orange borders, as well as the top of the cake, or wherever desired. Pour sprinkles onto top of the cake as well. Another fun option would be to add Halloween themed candies too!
If you prefer not to make or use fondant, this cake looks great with just the sprinkles too! |
|
|
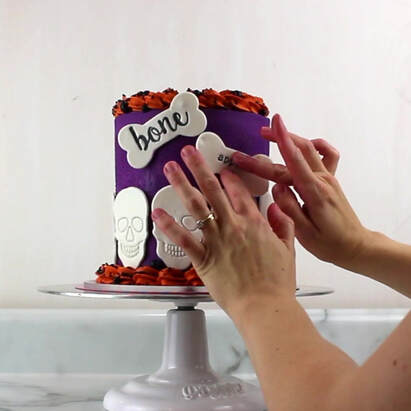
Step 9: Adding the Fondant Decorations
|
Once your fondant pieces have dried and hardened, pick up one of the skulls (or other Halloween shapes you have chosen), and pipe a dab of buttercream on the back (this will serve as the "glue"). Position this just above the bottom shell border (or wherever desired) on the cake. Arrange the rest of the fondant pieces on the cake using a dab of buttercream as well.
|
|
Supplies and Materials Links
Recipes for cakes, buttercream frostings, and fondant
Gel colorings: Chefmaster Liqua-gels or Americolor Gel-pastes: Amazon Storefront
Fondant skull cutter and embosser set
Alphabet embossing stamp sets
Fondant bone cutter set
Piping bags: various brands: Amazon Storefront
1M piping tip: Ateco or Wilton: Amazon Storefront
Turntable, offset spatulas, scrapers, cake pans: Ateco, NY Cake, Wilton, FatDaddios, various brands: Amazon Storefront
Sprinkle mixes: Sweets&Treats, SimplySucre, SprinklePop, Wilton, various brands: Amazon Storefront
Fondant rolling pin and tools: various brands: Amazon Storefront
|
I would love to see your sprinkle cakes!
Tag me @erin.cakesandcupcakes on Instagram, TikTok, or Facebook! |
|
Note: purchases made from links on this page may result in my earning a commission.