
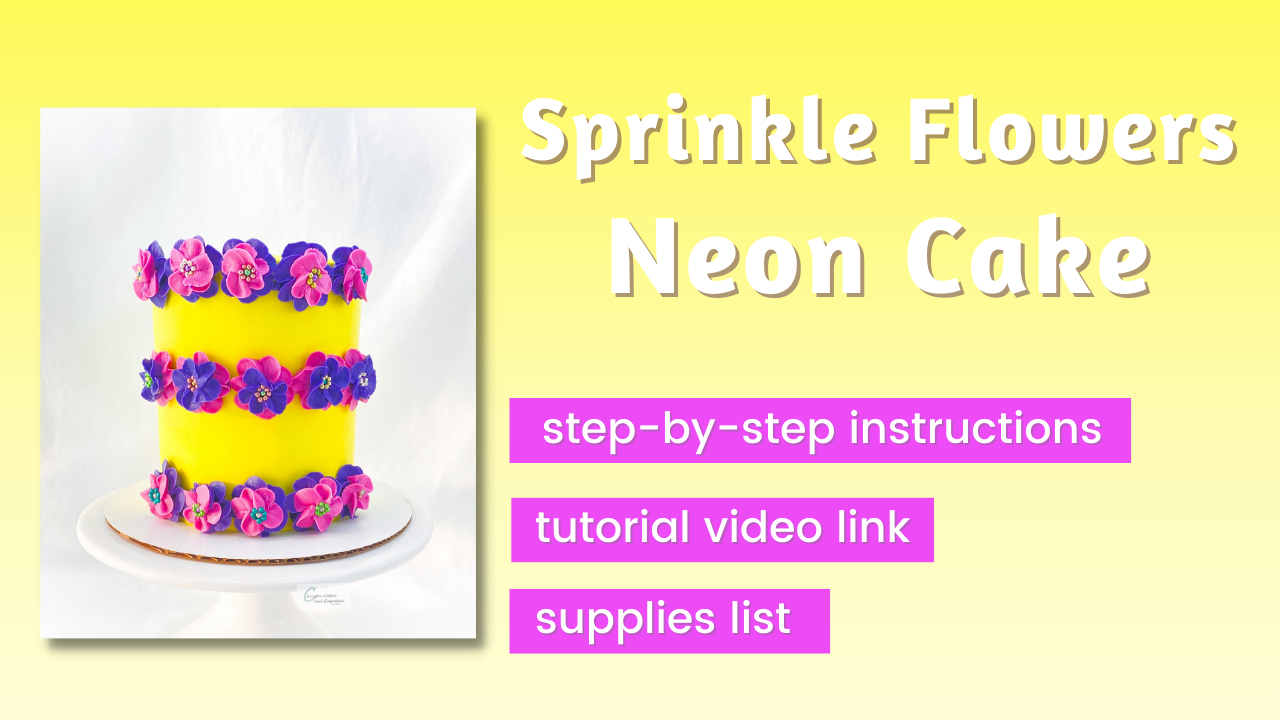
How to Make my
|
|
Piping buttercream flowers is a useful and fun skill to develop in cake decorating, and this little blossom adds a beautiful touch. I love when I get an opportunity to use vibrant, neon colors, as they definitely make a statement at the party.
What You Need
Find links for supplies and materials at the bottom of this page
Recipes for your favorite cake and buttercream frosting (find all my recipes HERE), or mixes
Cake pans: 5" or 6" sizes
Gel coloring - neon yellow, neon purple, neon pink
Cake decorating turntable
Offset spatula
Cake smoother/scraper
Piping bags
Piping tips - 103 (2 of them, or 1 tip and a set of small couplers)
Flower nail
Flower Nail Buddy stand
Metallic or colorful round sprinkles/dragees
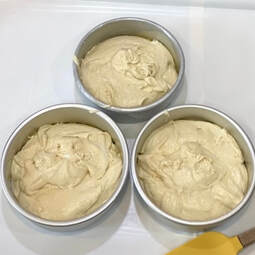
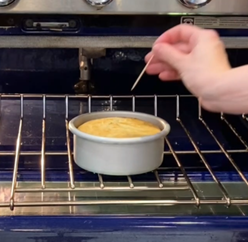
Step 1: Baking the Cake Layers
|
Mix up your favorite cake recipe (find all my recipes HERE), or use a boxed mix and prepare as per directions.
Decide which flavor(s) and size to bake. This design can be adapted for on any cake size. A very tall or very short cake will have a different look. I chose to make a 3-layer 5" cake here, but sizing is of course entirely your choice. My recipes can be found HERE, or you can use a preferred recipe, a boxed cake mix, or purchase a cake from a grocery store to decorate and skip this step. I like to add parchment circles to bottoms of cake pans for easy release. You may also cut circles from rolled parchment paper instead. Spray the bottoms and sides of cake pans with nonstick cooking spray/canola spray. Divide the cake batter evenly among the three cake pans, filling them approximately 1/2 to 2/3 full. Bake as directed by your recipe or mix package. Layers will be done once a toothpick comes out clean from the center. Run a knife around the edge of the pan to allow the layer to release more easily. Allow layers to cool completely before decorating if you are decorating shortly after baking. Otherwise, while still warm, wrap the layers in plastic wrap and store in the freezer in airtight container until ready to decorate. |
|
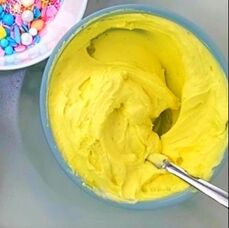
Step 2: Making Buttercream Frosting
|
Mix your favorite buttercream frosting (find all my recipes HERE) in a stand or hand mixer on low to medium speed, or use prepackaged frosting.
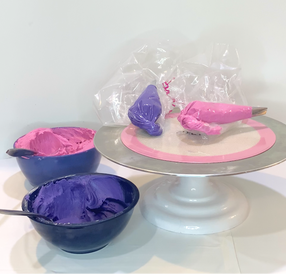
Divide the buttercream frosting into 4 bowls: 2 larger and 2 smaller bowls. Stir in gel coloring as follows (or as desired): - Larger bowl: approximately 2-3 cups: white (leave uncolored). - Larger bowl: approximately 2-3 cups: neon yellow gel coloring. - Smaller bowl: approximately 1-1.5 cups: neon pink gel coloring. Add 1-2 tablespoons of powdered sugar to stiffen the consistency. - Smaller bowl: approximately 1-1.5 cups: neon purple. Add 1-2 tablespoons of powdered sugar to stiffen the consistency. The colors will deepen with time, so buttercream may be made a day or two in advance and stored in the refrigerator in an airtight container. If refrigerating, allow buttercream to warm up a bit at room temperature before using to make piping easier. Keep covered until ready to use. Stir well just prior to using to press out air bubbles. |

|
Step 3: Stacking and Crumb Coating
|
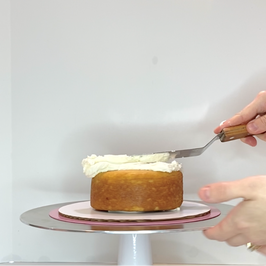
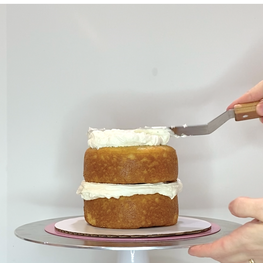
Using an offset spatula, spread a little of the light green (or white as per option above) buttercream frosting onto the cake board, and place the first layer down. Spread more of the buttercream onto the first layer, and then add the second cake layer. Repeat this on the second layer and place the third layer upside down on top (placing the top layer upside down gives a sharper edge to the top of the cake).
Spread the buttercream over top of the cake with offset spatula, continuing with the sides of cake as shown in video. Once the cake is covered, use the cake scraper to smooth the sides (see video), leaving a thin coat of buttercream. This may take several passes. Use your offset spatula or an angled spatula to pull the extra buttercream on top in toward the center to create a sharp edge. Chill the cake in the refrigerator for 20-30 minutes or until the buttercream is set and firm to the touch. |
|
|
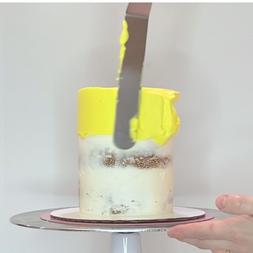
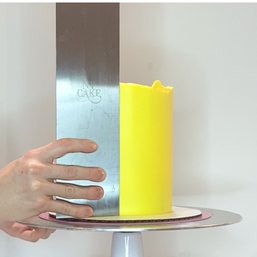
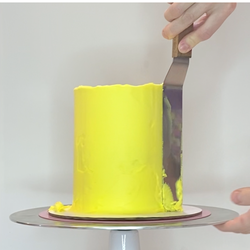
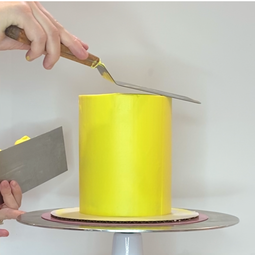
Step 4: Frosting the Final Coat
|
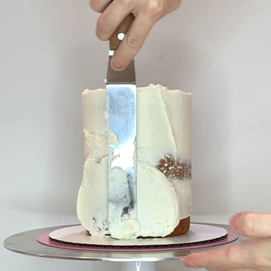
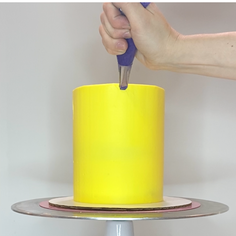
Spread a generous amount of the neon yellow buttercream over the top of the cake and continue spreading over the sides, keeping the spatula straight against the sides.
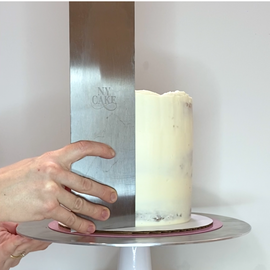
Smooth the buttercream with your scraper. It is helpful to warm up the metal under hot water (wipe dry) to soften and smooth the buttercream. This may take several passes. Create the top edge by pulling off extra buttercream in toward the center with your offset or angled spatula just like when crumb coating. Chill the cake in the refrigerator for 20-30 minutes or until the buttercream is set and firm to the touch. |
|
|
Step 5: Preparing to Decorate
|
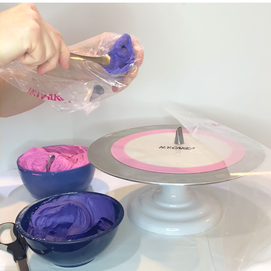
If you have two 103 (or other petal tips) tips, place each tip into a piping bag and cut off the tip of bag, so the piping tip sticks through, but stays in place. If you are using a set of couplers in order to share a single 103 petal tip, unscrew the rings from the couplers, and place a coupler into each bag first. Cut the tip of the bag off where the coupler starts. Place the 103 tip onto one of the couplers, and screw the ring over this.
Using a spoon or spatula, add the neon pink buttercream into one of the piping bags, and the neon purple buttercream into the other. |
|
|
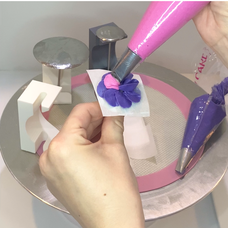
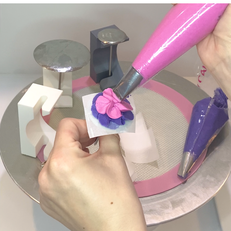
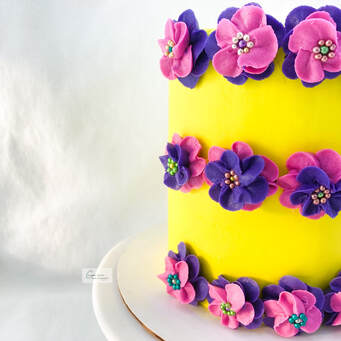
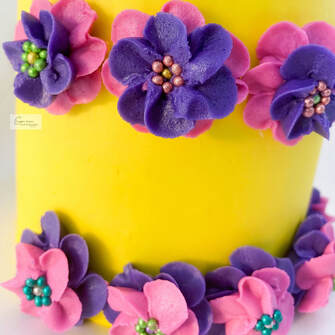
Step 6: Piping Buttercream Flowers
|
Watching the above video before and possibly while piping these will be helpful with these instructions.
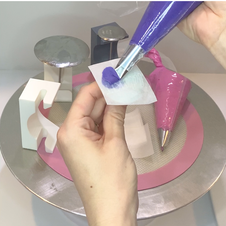
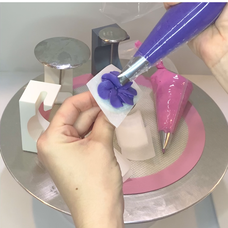
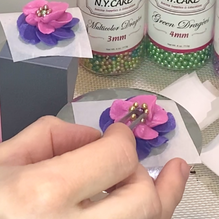
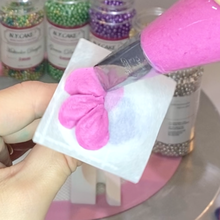
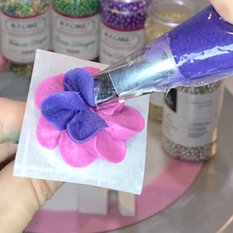
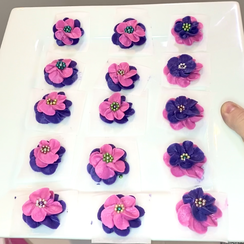
Pipe a dot of buttercream (any color) onto your flower nail and stick a parchment square on top. Hold the nail in your nondominant hand. Hold the piping bag in your dominant hand. Starting with the purple buttercream piping bag, hold the bag so that the wide end of the tip is down on the parchment and the thin end of the tip is up as shown in the video. Squeeze and move your wrist in an arc or an upside down teardrop motion to pipe a petal. Release pressure entirely. Turn the flower nail with your fingers to position it for the next petal (see video). Repeat this piping motion until the circle of petals is complete. Set the flower nail onto the Flower Nail Buddy Stand (or just continue to hold this upright in your hand) and switch to the pink piping bag. Using the same arc/upside down teardrop motion, pipe pink petals on top of the purple ones. Place the flower nail back onto the stand to set down the piping bag, and then using a tweezers, or your fingers, add the sprinkles to the center, sticking them into the buttercream as shown in the video. Carefully pull the parchment square off the nail and transfer it to a plate or cutting board. You can also just add the sprinkles to the flower once it is on the plate or board. Continue to pipe as many flowers as you’d like for your cake, transferring them all to your plate or cutting board. I piped some with purple petals first, as well as some with pink petals first. Take your time with this. Sitting down helps rather than standing up to pipe flowers. Place your plate or cutting board of buttercream flowers into the freezer and allow them to freeze for at least 15-20 minutes. This will make them easier to place on the side of the cake. |
|
|
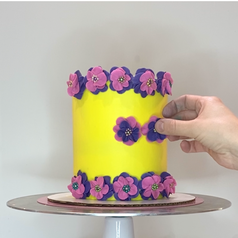
Step 7: Adding Flowers to the Cake
|
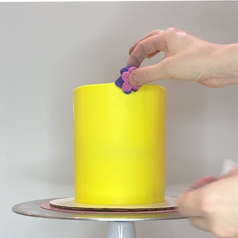
Once your flowers are well-frozen, pull the plate out of the freezer and have your cake ready. During this process, if you find your flowers are softening again, pop them back into the freezer for another ~15-20 minutes, place the cake back into the refrigerator, and continue the process, as warm hands can melt the buttercream flowers.
Pipe a dot of buttercream onto the cake where you plan to place your first flower (see video). Gently peel the flower from the parchment square and stick it onto the buttercream dot. Hold it here with gentle pressure until it stays in place. Continue this process until you have the flowers in your design of choice or as per the pictures and video here. |
|

|
Supplies and Materials Links
Recipes for cakes and buttercream frostings
Gel colorings: Chefmaster neon brite liqua-gels or Americolor electric gel-pastes: Amazon Storefront
Piping bags: various brands: Amazon Storefront
103 piping tips: Ateco: Amazon Storefront
Flower nails: Wilton: Amazon Storefront
Flower Nail Buddy Stand: Custom Cutters and Embossers
Turntable, offset spatulas, scrapers, cake pans, bowls, and spatulas: Ateco, NY Cake, Wilton, FatDaddios, various brands: Amazon Storefront
Sprinkle mixes: NY Cake, Sweets&Treats, SimplySucre, SprinklePop, Wilton, various brands: Amazon Storefront
|
I would love to see your buttercream flowers and cakes!
Tag me @erin.cakesandcupcakes on Instagram, TikTok, or Facebook! |
|
Note: purchases made from links on this page may result in my earning a commission.