|
|

|
How to make a
|
|
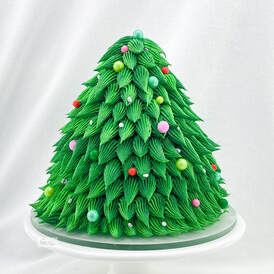
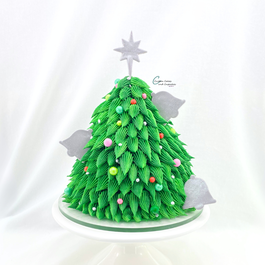
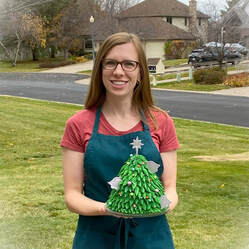
This 3D style Christmas tree cake makes a beautiful and easily customizable centerpiece for any holiday party! Create one to bring to a celebration or spend time working on one with your family to share.
This tutorial uses simple, repetitive techniques that truly make a fun, edible end product!
This tutorial uses simple, repetitive techniques that truly make a fun, edible end product!
What You Need
Find links for supplies and materials at the bottom of this page
Green and teal gel coloring (or desired colors)
Toothpicks/skewers
Cake and buttercream frosting recipes (find my recipes HERE) or mixes
Round cake pans in 6" sizes or 4" and 6" sizes (or similar sizes)
Cake board or base
Cake decorating turntable
Offset spatula
Piping bag
4B or 864 piping tip
Colorful sprinkles
Click here for my Christmas Tree 3D Cake DIY Kit!
Optional: fondant rolling pin and cutters to make toppers (find my fondant recipes HERE)
Optional: edible glitter dusts or shimmer sprays
Step 1: Baking the Cake Layers
|
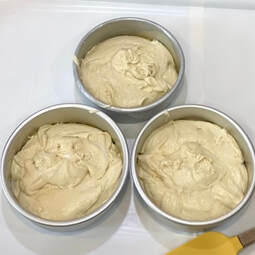
Mix up a batch of cake batter. Find my recipes HERE! Choose any flavor(s) you like! You can also use your own preferred recipe or a prepackaged/boxed mix. Optional - add colorful jimmies sprinkles to the cake batter to make funfetti!
Optional – place parchment circles into cake pans for easier release. You can also cut circles out of rolled parchment paper. Spray sides of cake pans with nonstick cooking spray/canola spray. The method shown in this tutorial and accompanying video uses three 6” cake pans, as these are common sizes, however a combination of small, medium, and large cake pans may be used together to achieve this design as well. If you have seen my method for making Barbie princess doll dress cakes, feel free to refer to that when using different size cake layers. If larger pans than 6” are used, more cake batter may need to be made. Fill the cake pan(s) approximately 1/2 to 2/3 full. |
|
|
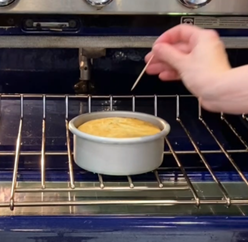
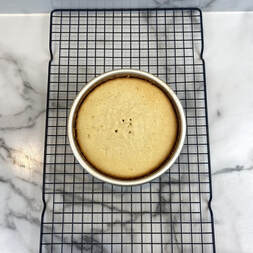
Bake cake layers at 350 degrees, or as directed by recipe or mix package, 1 or 2 cake layers at a time. Layers will be done once a toothpick comes out clean from the center, so timing will vary. Allow to cool completely before decorating. Run a knife around the edge of the pan to allow the layer to release easier.
|
|
|
Wrap each layer tightly in plastic wrap and store in the freezer in airtight bag or container until ready to decorate.
|
|
Step 2: Preparing Buttercream Frosting
|
Find my vanilla buttercream frosting recipe HERE, or use your favorite recipe or prepackaged frosting if desired.
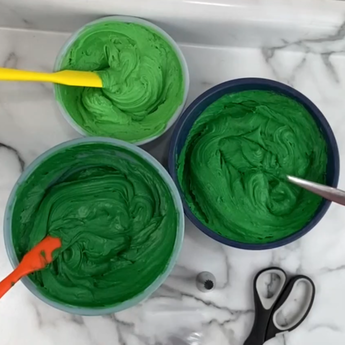
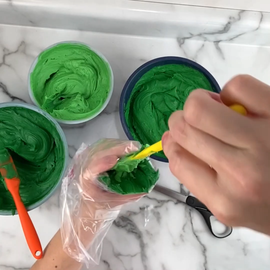
NOTE: buttercream frosting can be made a day or two ahead of time and stored in airtight containers in the refrigerator. Mix buttercream frosting in a stand mixer or hand mixer on low to medium speed or as per recipe. You will likely need to make at least a double batch of buttercream frosting. Divide the buttercream frosting into 3 bowls: 1 larger and 2 smaller. Add the gel coloring as follows, and stir, adding more if desired: - Green: large bowl: 8-10 drops green gel coloring - Light Green: smaller bowl: 2 drops green gel coloring - Dark Green: 6 drops green and 4-6 drops teal gel coloring Colors will deepen with time, so it works well to make the buttercream frosting a day or two in advance and stored in the refrigerator in an airtight container for colors to become more vibrant. If refrigerating, allow buttercream to warm up to room temperature (this may take a few hours) before using to make piping easier. Keep covered until ready to use. Stir well just prior to using to press out air bubbles. |
|
Step 3: Stacking, Carving, and Crumb Coating the Cake
|
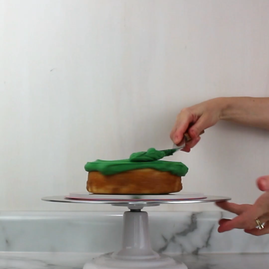
Spread a little of the "medium" green buttercream (from the large bowl) onto the cake board to help secure the first layer. Place the first layer down (if you are using multiple sizes, choose your largest layer first). Spread more of the green buttercream onto the first layer, and then add the second cake layer. Repeat this on the second layer and place the third layer on top.
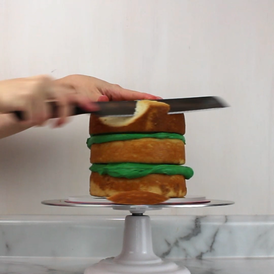
Using a serrated knife, begin to carve the layers into a cone shape. This may take many cuts. Take your time, and every so often, step back and look at the shape from a distance to ensure everything looks even. BE CAREFUL with where your opposite hand and fingers are placed during this time! Take 1-2 of the cut cake scraps and squeeze/sculpt it into a little pointed cone to add to the top of the cake using a little bit of buttercream to attach it. See video. Save and freeze cake scraps to make cake pops, cakesicles, or just eat them while you decorate! |
|

|
|
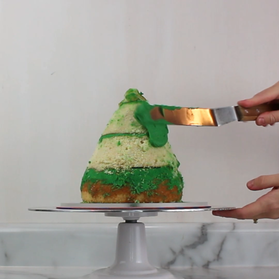
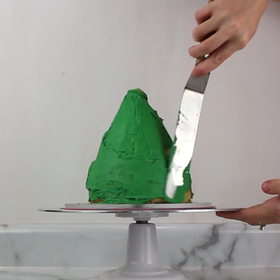
Using an offset spatula, spread more buttercream frosting all over the cake to create the crumb coat. This layer of frosting will keep all the crumbs from the cake layers from getting into the final decorating layer. Cover the entire cake. See video.
Chill the cake in the refrigerator for 20-30 minutes for the crumb coat to chill and set. |
|
|
Step 4: Preparing to Decorate
|
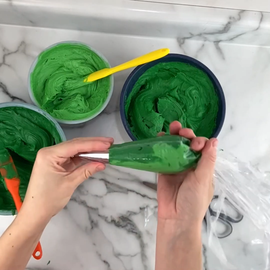
Place tip 4B or 864 (they are interchangeable) into a piping bag and cut off the tip of the bag, so the piping tip sticks through, but stays in place.
Stir each of your green buttercream colors by hand to press out any air bubbles that may have developed. Using a narrow spatula or butter knife, spread some of the dark green buttercream onto 1 side of the piping bag as shown in the video. Use the same technique to spread some of the light green buttercream onto the other side of the piping bag. See video. Fill the remaining space in the bag with the medium green buttercream. Squeeze a little bit of this back into the bowl to ensure all 3 shades of green show up together. Refill the piping bag as needed while piping with all three shades of green as desired. |
|
Step 5 Piping the Tree Branches
|
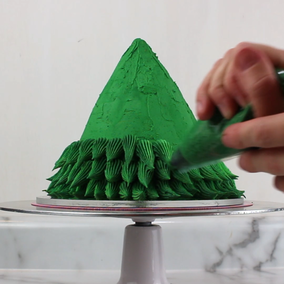
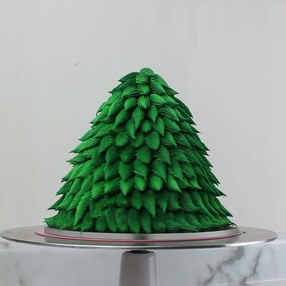
Starting at the bottom of the cake, squeeze the piping bag to anchor the buttercream to the cake, pull outward and gradually release pressure to pipe a tree branch See video for method.
Continue this around the entire bottom border of the cake, covering all surface area. Create a second row immediately above the bottom row, continuing to pipe branches to cover the cake. Pipe more branches to cover any gaps. The piping bag may need to be refilled a few times with the three shades of green. It is ok if the greens mix a bit. Finish with a few shorter branches around the top of the cake. See video. |
|
Step 6: Decorating the Tree
|
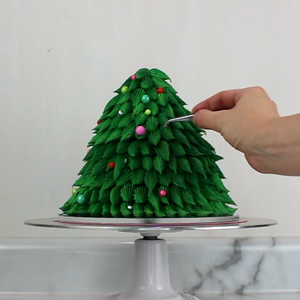
Select desired sprinkles and styles. This is a fun opportunity to try different color schemes!
Add these all over the branches either spaced randomly or in a desired design. A tweezers can help place the smaller sprinkles. |
|
|
Optional Decorating Ideas
|
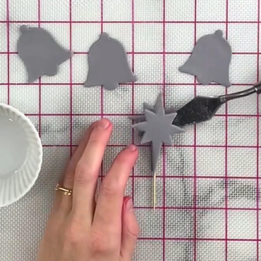
Create a fondant tree topper using a star, angel, or other cutter. Use a toothpick to secure this into the cake. See video.
Dust or spray edible glitters or shimmer sprays. Create fondant ornaments using bell or bauble shaped cutters to add to the tree. Add small candy canes or other festive candies to the tree. |
|
|
|
|
Helpful Notes
|
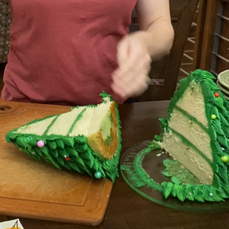
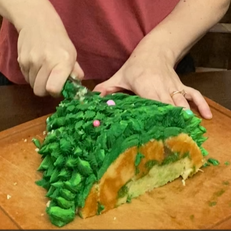
I've found the easiest way to cut this cake shape is to start by cutting the entire cake in half, down the center. Place each half cone slab down on a cutting board, then begin cutting these into long slices. Cut these slices in half, or even in thirds to serve.
|
|
|
Supplies and Materials Links:
Recipes for cake batters and buttercream frostings
Gel coloring: Chefmaster liqua-gels: Amazon Storefront
Cake pans, offset spatulas, and turntable: Ateco, Wilton, various brands: Amazon Storefront
Piping bags and piping tips (this tutorial uses 4B or 864): Wilton, Ateco, various brands: Amazon Storefront
Parchment circles and cake boards: Wilton and various brands: Amazon Storefront
Sprinkles and sprinkle mixes: Sweets & Treats, SprinklePop, SimpleSucre, and more: Amazon Storefront
Serrated knife for carving 3D cakes: Wusthof: Amazon Storefront
Marshmallow fondant recipe
Christmas fondant cutters: Custom Cutters and Embossers
Edible glitter dusts: Sweets & Treats, Bakell, Sugar Art, and more: Amazon Storefront

|
I would love to see your Christmas tree cakes!
Tag me @erin.cakesandcupcakes on Instagram, TikTok, and Facebook!
|
|

Need more holiday cake and cupcake videos? Here are others I've made, and I have more coming soon!
|
|
|
Note: purchases made from links on this page may result in my earning a commission.